For next week's Photoshop exercise, you'll use (at least) three images and create at least 3 images.
You can use the highly-automate Photoshop tools, or you can dare to take more power to yourself with more manual methods.
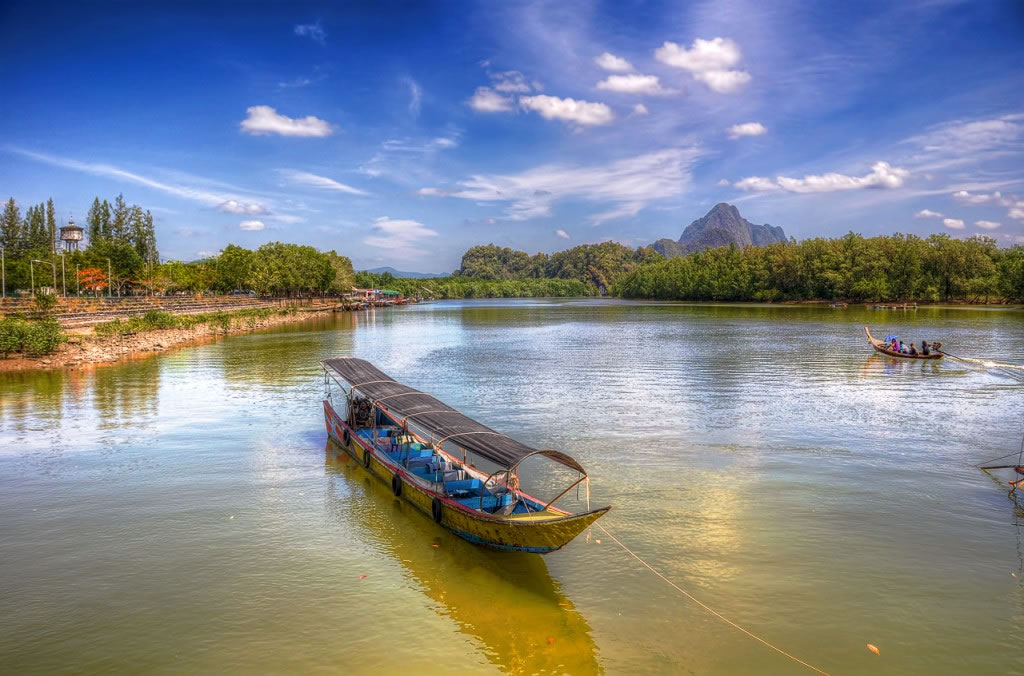
Photoshop CS5 Merge HDR
Creating an HDR Image from a Photo Set — a useful step-by-step written tutorial.
Create enhanced HDR images with HDR Pro — a very nice video tutorial on the entire process in CS5
Richard Harrington's UAP Intro to HDR Pro — a very good video on the process and tools.
Features that support 32‑bpc HDR images — Photoshop can create, and edit "deep" 32-bit image files. These offer far more nuance and range of tone and color than can be displayed in a single image. However, not all of Photoshop's tools can be used on a 32-bit image. The Photoshop tools listed here can be used to refined the traits you want to pull out of that deep image. (see also: Adjusting Dynamic Range in 32-bit Images)
Try Hand Stacking and Masking Images:
In Photoshop, put each image on its own layer...
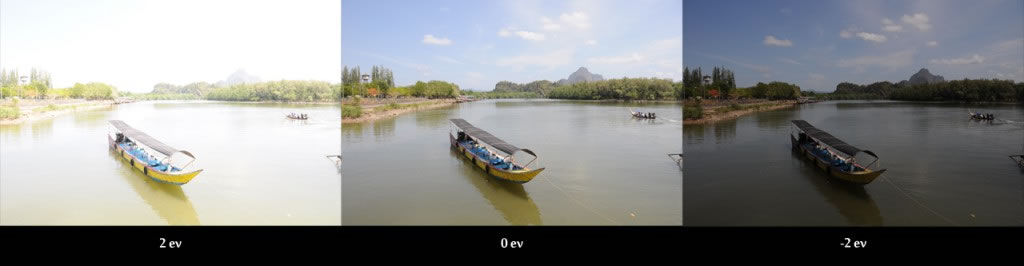
ideally you've got several identically framed images (i.e. you used a tripod).... if not, drag the images so that they line up correctly.
You may set the upper image(s) to 50% transparency so you can see the alignment.
You may have to rotate one or more images.
The tricky part involves creating layer masks to expose the best exposed region of each image.
— in intense highlight areas, your masks will expose your darkest, or most underexposed image.
— in intense shadow areas, your masks will expose your lightest, most overexposed image.
— midtones will usually come from your "correctly exposed" images.
All of this, above, is done by manually usually using the airbrush tool to lighten and darken regions of each layer mask.
Do all that, and you'll likely have a decent HDR image...and you'll appreciated the automated tools offered by Photoshop's PhotoMerge tool.
Photoshop: File: Automate: Import to HDR Pro
In Photoshop:
File: Automate: Merge to HDR Pro...
Browse to select the images to be merged. (OK when all selected)
Once Photoshop loads the images and does some initial processing, one version of your HDR image will appear, along with thumbnails of your source images, and a panel of settings you can adjust on the right.
Explore the presets which are in a drop-down menu at the top of the settings panel.
Explore the impact of various settings.
When you're satisfied, Click OK and Photoshop will merge all of your source photos using your settings into a single-layered image.
Hugin — for elaborate, tough, large or alt projections
Hugin also has tools for manipulating HDR images.
Workflow Description(old) | Video Tutorial*** |
Camera Raw — one image only
Note: this technique isn't "real" HDR, but its a quick way to get some of the advantages of HDR using a single RAW image.
Open a single RAW file in Camera Raw.
Use the Exposure Brush tool to selective under- and over-expose regions of your image.
This simple technique offers many of the advantages of stacked HDR images by allowing you to "pull" higher exposures out of some portions of your image, push lower and darker exposures into some areas, and keeping the general existing exposure for the rest.
Again, this isn't "real" HDR, but the technique produces images that have some of the visual traits of an HDR image using only a single original image.