Before very long, you'll be turning in a photobook of your work.
This week I need for you to explore the layout tools of the book-printer you'll be using.
My main goal is that you know what your layout options and methods will be, before you rush to complete your book for printing. Most or all book-printing sites allow you to start designing a book online, partially complete it, then save it. You can upload images and lay out your book without paying anything. You can reopen and continue whenever you want.
So, figure out what size/dimensions your book will be.
Figure out what template, if any, you're going to use.
Try uploading a few images and placing them on those pages. (don't worry, you can delete pages at any time — these don't have to be your final "real" photos.)
Basically, go through the upload, design, layout process enough that you know what your options will be when you lay out your actual book.
While there are many companies that can print your book, there are several different ways to create and lay out your book pages.Most sites allow some flexible alternative to their templates. Often this involves laying out your pages in Illustrator, InDesign or even MSWord, and then exporting to a PDF, and uploading the PDF. For most sites, you could lay out a full page in Photoshop, including text or other graphics, then upload the entire page as a JPG.
Send me you notes on book design alternatives: TopTenReview of Photo Book service providers
AdoramPix | MixBook | PrinterPix | VioVio | Walmart | Walgreens | Blurb | Shutterfly | MyCanvas | Kolo | MyPublisher | LuLu | SmileBook | Snapfish | NationsPhotoLab |
AdoramaPix:
MixBook:
Highly rated for its quality, diversity of options and ease of use.
Review | Use coupon code TOPTEN20 at check-out for 20% discount on 1st order |
PrinterPix:
They offer 17 layout templates.
I don't see anything on uploadable layouts.
For freeform layouts, be sure to watch their book-making tutorial video.Note: if you watch their little book-layout tutorial video, at the 2minute point, they show you a secret: You can make any image into a background! ...even a background that spreads across 2 pages. Thus, if you prepare an entire page as a single JPG image, you can upload it and use it as a full-bleed image. (be sure to study the video from minute-2:00 - 3:30 for the main layout/arrangement controls)
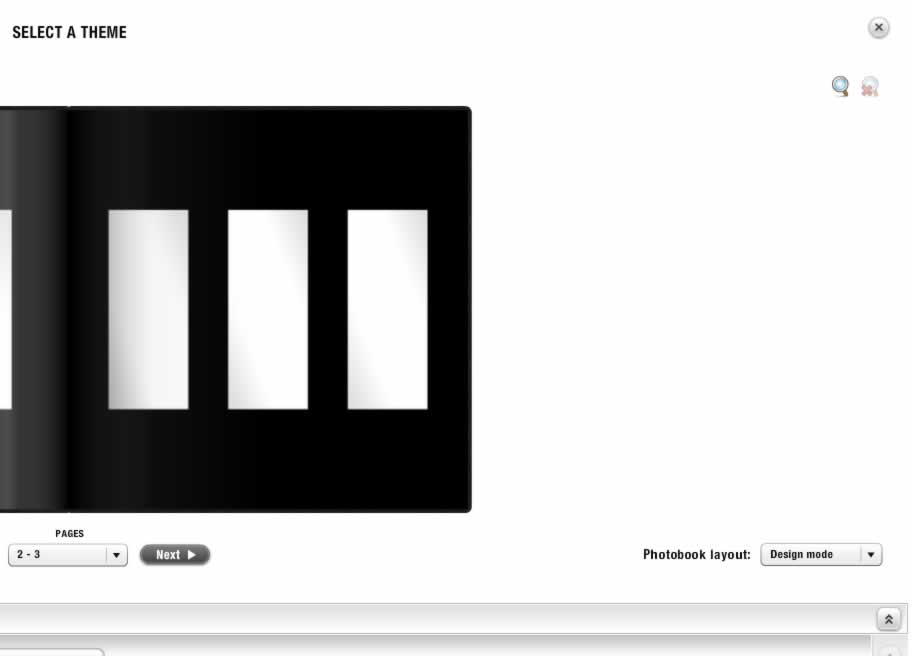
So far, I opt for the Theme: Classic: Plain Black
This is closest to a freeform, image-only book. It is still not fully freeform, but that's what the video helps with.Be sure to switch to Design Mode rather than the default Economy mode.
see Photobook layout: drop-down menu in lower right of PrinterPix layout page:
VioVio:
VioVio offers a wide variety of layout templates or PDF upload.
Many of their templates are free to use. Some cost a few dollars.If you upload a PDF, be sure to study this page to get the production details right. (fonts, bleeds, color model, etc.)
SnapFish/Walmart/Walgreens:
(they all use the same production services and, I think, their setup web site is the same or similar)
Procrastinators: Note that Walmart offers some sizes of photobooks with a one-hour turnaround. (if anyone tries this, let me know so I can see the quality of the printing.)
For Next Week
Required:
— In an email:
– Which photobook company will you be using?
– What size and format (landscape/portrait)?
– What is the turnaround time (from final upload/design to delivery with normal shipping)?
– How will you be laying out your book? (
Illustrator-to-jpg/pdf-upload
InDesign-to-PDF-upload
Photoshop-to-JPG/PDF-Upload
Layout using online software
— Prepare at least 5 spreads (pairs of facing pages) of your photo book.
— Show us your layout
Some photobook sites provide a web link to your book. (AdoramaPix, VioVio do) So, send me an email with your link. (here's mine)
OR
Upload images of those pages to DropBox. To do so, either
a) create your layout in InDesign/Illustrator and upload a JPG/PDF to DropBox
or
b) create your layout on your book-printer's website, and create screen-dumps of your pages. (I've not yet seen a site that lets you download your layouts...let me know if you find one.)______________________________________
Notes on Screenshots
If you're using your book-printing web site to build your book, you may have no way to download a copy of the book layout itself. In that case, just create screenshots directly from the web site. Below are notes on how to do that.Screen Dump a part of a Mac screen to the Clipboard:
Ctrl-Command-Shift-4 (press all at the same time.)
Then drag a rectangle around the area you want to copy.
The copied image is on your clipboard... you can paste it into photoshop or MSWord or whatever.Screen Dump a part of a Mac screen to a file on your desktop:
Command-Shift-4 (press all at the same time.)
Then drag a rectangle around the area you want to copy.
The copied image is now a file on your Desktop. You can open it in Photoshop.Windows Screenshot Instructions
Most of you can use Accessories: Snipping Tool
______________________________________
The articles linked/discussed above deal with correction-repair techniques.
Those are the key skills you'll needed.Goal: Create 3 different images with problems and make them presentable.
Select images that need repair...images that you'd like to reshoot, but can't.Your full-size, Photoshop image should be at least 4mpix.
Create a lower-resolution version of your images for uploading to DropBox.
Follow the steps illustrated here to create a 2-megapixel version of your image for in-class viewing.
Save those images to your DropBox Art265_Photography folder.
Create a folder called: Wk11_PhotoBookDraft
Save...
a) a PDF of your book design.