Exhibits are about quality — not quantity.
Therefore, present those works that demonstrate distinctive accomplishments — success with a particular medium, success with a particular syle, success with ideas, content, subjects or issues.
Ask yourself — why am I including this piece in this exhibit? If you don't have a good reason, maybe it shouldn't be included.
How many works do I need to include?
That really depends on the gallery.
The gallery is the medium for your exhibit — its size, shape and traits matter.
Most simply, don't overcrowd the gallery and don't leave it feeling vacant or incomplete.
How many pieces are best, depends on the size and presence of the pieces themselves. Issues involved include whether your works are 2D or 3D.
Can they be grouped or must each piece have its own "breathing room"?
If there is a very tall wall, do you try to use that high, vertical space or do you just use the lower section?
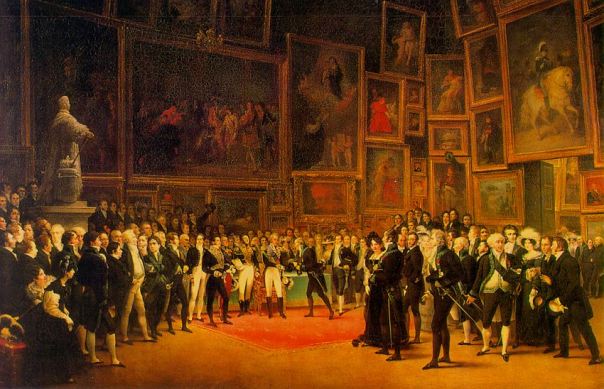
Have you ever seen images of the 19th c. Paris Salon exhibits? Palacial walls were stacked floor-to-ceiling with paintings.
Historical Precedent: Yes.
Should I do it? No.
If possible, get a floorplan of your exhibit space.
Sketch out where works might go. Think about how many works might be needed to fill a particular wall. See if additional portable walls might help.
Once the gallery is ready for hanging, bring your works into the gallery and spread them out in the exhibit space. In effect, hang the show along the floor — lean each work against the wall that you might hang the work on. This will give you a good impression of how the works will fit — how much space is really needed for each piece. When doubt, remove a couple of works and spread out the rest of the pieces. See if it feels more comfortable, or too sparse.
Once you've settled on where generally to put works, start to hang the major pieces. Make sure that your strongest works have plenty of space and are not crowded into corners (unless that's where they belong.) Once your showcase pieces are hung, go on with the rest of the pieces. Be particularly careful in corners — corners are somehow sensitive to "crowded" and "empty" feelings.
Guest book Its fun to have a record of attendees, but guest books are actually serious business. Give visitors a place to sign in before or after seeing your exhibit. A lined guestbook encourages folks to just sign their name. A clean-sheet guestbook will encourage them to leave notes or messages. If you've paid attention at other exhbits, you've seen some fun ways to invite messages (multi-colored pens/markers, post-it notes for by-the-artwork notes ).
Before you decide what you want in your guest book, look over notes on marketing. Decide what info you might use later on, for your next exhibit. For instance, if you get viewers' email addresses you can build an email list so you can easily tell your fans about your next exhibit, about a completed commission, or about other professional accomplishments. Use your exhibit as a way to collect names and contact info so as to build a professional client list — even if they are friends and family but not yet buyers, collect their info.
Labels:
Each work being presented needs a nearby or affixed label that identifies it. At the very least, viewer wants a title.
How much information should you give them on each artwork? Usually a label needs a title, medium, usually a date (year-only is fine). However, you can also include information on your goals for the work. You could describe the context, problem or assignment that prompted the work. You might describe the sources of inspiration for the work. You might include a poem, scripture or other quote that relates to the theme of the piece. Some viewers really enjoy learning the backstory of artworks — it enables them to feel more connected. Other viewers won't read the information at all — and your signs won't force them to — so everybody wins.
If there are several artists exhibiting in the same gallery, each label should clearly indicate which works belong to which artist. It can be helpful for each artist to use their own color for a label, type or logo so that their work can be quickly distinguished from a distance. However, at the very least, be sure the individual artist's name is clear and prominent on each label in a group exhibit.
Make sure they can be read from a comfortable distance.
Do you want the viewer to be able to read the sign while they view the artwork, or do you want them to break contact with your work and walk close to the wall? You might print key info large (say 18-24pt, and any detailed narrative at a smaller size. (~12-14pt)
How do I attach them? (sticky tack? rubber cement? don't use glues/tapes that will peel paint off of the gallery wall)
Let's collect advice for students who are hanging their first show. (one of the problems with our Senior Exhibits is that anyone with experience, leaves.)
Describe the 3 things that you would do differently if you had your show to do over.
Document the Show
Take photos of the gallery — with or without people. You might want to ask a photo-savvy friend to shoot photos during your reception, capturing folks talking with you and looking at your works. Really... ask someone else to do it. Don't try to be both photographer and exhibit host(ess.)
You might also take video of the empty exhibit. Just get a few wide angle shots of the entire gallery from several viewpoints. Then walk along as though you were a viewer and video each work. If you have another friend who can shoot video at your reception/opening, you might want to put them to work for some of the casual interactions.
Document your Works
Take portfolio-quality photos of every work in the show. Often, works are most photo-ready when they're ready for exhibit. They weren't finished or framed before the exhibit, and they may be sold or hanging elsewhere afterward.
Good lighting. Good camera and lens with adequate resolution. Avoid glare. If needed, use a tripod to get still, well-framed images. Every image in focus. Alligned well. Artwork parallel to the camera — that is, no skew images.
Good exposures and white balance. Where appropriate, shoot details as well as full shots. For 3D works, shoot multiple points of view. Clean backgrounds — watch the negative space carefully as you're framing gallery shots of 3D pieces, especially. If possible, shoot works against a white, black or other solid-colored wall or backdrop. Make sure that you have genuinely good shots of every piece before you put equipment away. Then backup your memory card/images in multiple locations. Edit your photos for best lighting, color and cropping.
Make notes on each work. Use a word processing document with table, or a spreadsheet or database. Collect title, medium, dimensions, date, any background notes, current price, buyer (if sold) with contact info, and current location of the work. Maintain this info on an ongoing basis. For most of us, a day comes when we wish we had that info collected, organized and accessible.
Imagery: excellent images of your works in medium size JPG files.
Info on your works:
Web Host: your web site — or the files that make up your web site — have to be stored on a computer that serves files to the web -- a web server. Today there are endless web hosts out there. You can find hosts that will allow you a free web site. Usually the site will be small, your site options may be limited, and you may have to endure ads or borders owned by your web host.
Look for free or inexpensive web hosting options tailored specifically for artists or photographers. There are a variety of groups that share costs and web infrastructure.
You can get your own web space fairly inexpensively.
You can share web space with other designers. Most major web hosting options allow several (or unlimited) sites to be hosted on the same account. This may take some coordinating with friends, but if you have a friend that is a web designer, this may be an option.