Goals & Concept
It was said in earlier project notes, that images are not solely dependant upon subject matter, but rather that pure formal aesthetics are a part of what the viewer responds to, and thus are a part of what the photographer must offer.
Even when the subject is a human being — a face, head or figure — the subject is only the beginning — it is the form on which patterns of light play.
Photos are fundamentally captured light. In portraiture, light is without a doubt, a powerful influence on the nature of the image as well on the character conveyed by the sitter.The Short Version
Create a series of 5+ visually distinctive portrait images of a single sitter.
Create a layered composite image in which at least two of your portraits are creatively and expressively combined into one unified composition.
Turn in the best 18+ images so that, for each image in your final series, we can see two other images that competed to be in the final set.
Lay out a composite image presenting all images in one.
You'll be shooting a collection of images of a single sitter.
You'll vary lighting, exposures, backdrops, point of view and sitter poses in order to create a varied but unified set of portrait images.
Vary your point of view, your exposures and your lighting agressively; vary the subject or sitter only in limited ways.You might pick 5 and only 5 poses, but shoot 20 or more images of each pose.
Explore what control you have as an imagemaker, rather than relying on evokative traits in the sitter. Use the play of light and shadow to establish patterns of shape and masses.
Explore how the location of light sources alters form and shadow.
Explore how the relative brightness of different light sources alters form and mood.
Explore how the choice of direct vs. diffuse light alters form and shadow.Consider shooting this set in Black & White.
You will also be using your Photoshop skills to create a multi-portrait — an image composed with at least two portrait images of the same sitter.
You may need to refresh yourself on basic Photoshop compositing techniques. You'll place each image on its own Photoshop layer, positioning them to interact well. You'll use layer masks to control which portions of each image are visible in the final composition.You will also lay out a composite the presents all of your final images in one image.
Resources
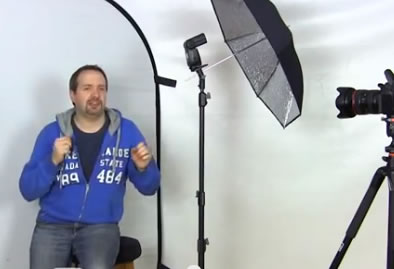
Studio Lighting issues and strategies. Most of this site's lighting discussion and links are here.
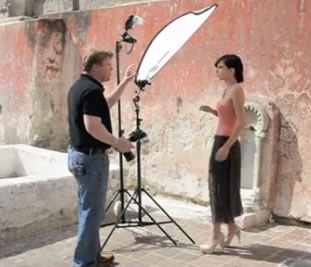
Adorama tutorial on Indoor Portrait Lighting tactics using natural light, a single flash, and/or a reflector.
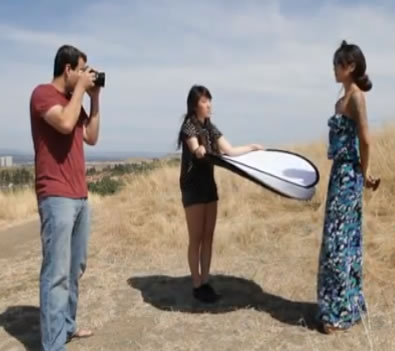
Adorama tutorial on Taming Hard Sunlight for Flattering Outdoor Location Portraits.
Joe McNally
Shows the use of diffuser panels, reflector panel, fill flash, and direct sunlight.
(part 2) Softening, Diffusing and Managing Hard Light
Joe McNallyShows the use of a light blocker and hand-held pole flash.
Outdoor Portrait Lighting with Fill-Flash
Tony Northrup
Outdoor Portrait Lighting with natural sunlight and reflectors
SLRloungeVery different self-portraits via changing backgrounds.
Gavin Hoey(this video focuses on post-processing far more than lighting.)
In Photoshop he extracts the portrait from the background using complex selections and refine edge tools.
The tutorial offers a fairly extensive post-processing workflow for altering and refining portraits.
Prep
— Review the basic operations of a digital SLR.
— Have a memory card prepped.
— Reset defaults on any borrowed camera.
— Image Format: RAWWhat shooting mode will you use?
If I am concerned with depth of field, I'll likely prefer Aperture Priority Mode.
If I want to produce motion blur, or be sure to avoid it, I may prefer Shutter Speed Priority Mode.
You could shoot this set on full auto (P) or manual (M).You might turn on Auto-ISO Sensitivity.
Focussing: Auto or Manual?
If the images you concieve involve a very narrow DOF, you may want direct control over focus and so use Manual focus. This can be easier to manage if you're on a tripod and your subject is very close.
You might also use the Focus Lock technique to tell the camera what forms to auto-focus on. This is easier if you're shooting hand-held rather than on tripod.
Camera Manual PDFs: D7000 Manual — p. 97 | D90 Manual — p. 57
Process
Shoot roughly 100+ images.
Vary your point of view, your exposures and your lighting agressively; vary the subject or sitter only in limited ways.
You might pick 5 and only 5 poses, but shoot 20 or more images of each pose. See what control you have as an imagemaker, rather than relying on evokative traits in the sitter.
You might explore portrait images online in order to find ideas for poses and setups that would be worth pursuing.
— Edit images with potential into sets of finished images.
You’ll have to settle on the theme that your images will reflect -- pick one of the themes noted above.
Now start cropping, rotating and editing these images for best effect.
When working in Photoshop, avoid using decorative filters. Do not added elements, or erase elements in any image. Cropping, rotating and limited global color/contrast editing are allowed.
— Upload to Google+ into “006 Portrait LIghting” folder. Drag that into your Art 265 circle.
— Describe the traits that unify this set of images. Write a short (25-75 words) concept statement that describes the visual traits or ideas that this set of images emphasizes.
— Review and comment* on the photos uploaded by at least 7 other students before class.
* Provide relevant comments (25+ more words) discussing what you see in the photos presented -- comment particularly on what impresses you or what catches your eye. Comment on what you think might improve the cropping or editing of the presented photos.
Required
By Tuesday, 8am
Shoot at least 100 images.
Select (at least) 20 of those for editing.
Select 5+ of those individual portraits for G+ presentation.
Create 1 multi-portrait composition.
Lay out a composite of all of the final images.
Drafts/Rejects: another dozen images edited for use, but that are not strong enough for your final set.
Downsize images to 2Mpix JPGs before upload.
Post to G+ :
Project Photo Album: 006_PortraitLighting
(5+ individual portraits; 1 multi-portrait; Composite; and another dozen draft/reject images.)
Write an artists statement for the final series.
— Discuss whatever theme or emphases you discovered as you shot, illuminated, composed, edited and selected your final images. What attitude did you find yourself attempting to express through your images?
You might describe what you found as you surveyed your images in Bridge. What surprised you? How did your direction change as you went?
— Write critical comments about the final series images: Discuss the strengths of the final images in relation to that theme.
Thursday, before Class
Crit your Peers:
Go to G+ and review what your classmates have uploaded.For each classmate, go to their 006_PortraitLighting album, and then to their Final Series sub album.
Add comments to at least one image, or to the series as a whole.
Discuss ways in which the series is formally unified — what traits tie the separate images together?
How compositionally successful are the images? What is interesting about them?