High Dynamic Range Images on Flickr | HDR Group | HDR Resources | Article |
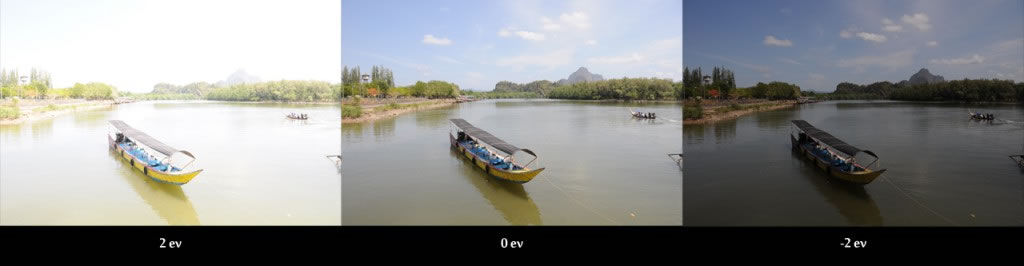
These three images, below, vary in exposure — they are bracketed exposures.
The left image is about 2 stops over-exposed,
the middle is "correctly exposed" and
the right image is about 2 stops under-exposed.
from http://farbspiel-photo.com/learn/hdr-cookbookUsing Photoshop's Merge HDR tool, the three exposures — the three images — can be combined to produce a single HDR image in which a much broader range of value contrasts are sustained throughout the image.
In general, HDR images compress a scene's dynamic range — which typically involves darkening blown-out, overexposed areas, and lightening dropped-out, underexposed areas in such a way that all tonal areas of the image have tonal definition.
from http://farbspiel-photo.com/learn/hdr-cookbook
High Dynamic Range Images
Photography has always been limited by the range of light and dark that can be captured by film or by digital sensors, compared to the dynamic range of luminance that the human eye can see. Basically, a camera cannot capture the full range of light and dark that you can observe.
High Dynamic Range imagery involves using several different exposures to create a single image. An HDR image compresses an excessively wide dynamic range into a narrower, viewable range.
Adobe/Photoshop Intro to HDR
This page offers good intro to the tools in Photoshop that offer control over HDR images.
The key steps in Photoshop or Bridge are here.
Photoshop: Choose File > Automate > Merge To HDR Pro
Bridge: Select the images you want to use and choose Tools > Photoshop > Merge To HDR Pro
Background
and Info: WikiP | CambridgeColor*** | Pixiq | Shooting HDR Images |
Flickr HDR Group Discussion Topics | Bracketing Exposure Bracketing |Samples: | Captain Kimo | HDRCreme | Smashing |
Tutorials: A collection of tutorials | Handheld-HDR Shooting | Photoshop Steps | Photoshop Basix Video Tutorial on HDR***
Photoshop Steps | Photoshop-Photomatix Steps | PS-Photomatix Steps & HDR Intro |HDR Cookbook
This website has an abundance of outstanding, practical and impressive information on creating HDR images.Pics To Play With
This photographer has shot some outstanding HDR images — some of which are posted here. However, he has also posted several sets of source images so that you can download his sets of exposure bracketed images, and then try Photoshop/Photomerge, or HUGIN to manipulate the images yourself.
HDR Stacking in Photoshop
There is an ever-increasing variety of tools and techniques for creating HDR images.
You can use the highly-automated Photoshop tools, or you can dare to take more power to yourself with more manual methods.Adobe/Photoshop Intro to HDR | Photoshop CS5 Merge HDR
Creating an HDR Image from a Photo Set — a useful step-by-step written tutorial.
Create enhanced HDR images with HDR Pro — a very nice video tutorial on the entire process in CS5
Richard Harrington's UAP Intro to HDR Pro — a very good video on the process and tools.
Features that support 32-bpc HDR images — Photoshop can create, and edit "deep" 32-bit image files. These offer far more nuance and range of tone and color than can be displayed in a single image. However, not all of Photoshop's tools can be used on a 32-bit image. The Photoshop tools listed here can be used to refined the traits you want to pull out of that deep image. (see also: Adjusting Dynamic Range in 32-bit Images)
CS6 Bridge & Photoshop Workflow
The short version...
1) Shoot three or more exposure bracketed images.
2) Select all images in Bridge
3) Give the command: Tools: Photoshop: Merge to HDR Pro...
4) Wait for initial processing by Photoshop, then adjust settings to your liking. Then click "OK" to complete the blending of the stacked images into one image.________________________________________________________________________
In more detail...1) Shoot three or more exposure bracketed images of the same scene.
(ideally, but not necessarily with a tripod. Photoshop will work to align nearly identical images, and typically handles this fairly well.)
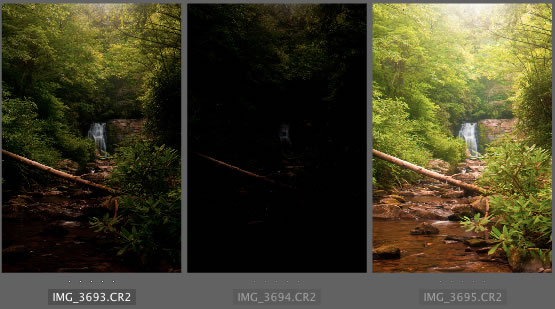
These three images are bracketed by plus 2 EV and minus 2EV, creating a 4-EV exposure variance, which is not, by HDR standards, a particularly wide dynamic range.
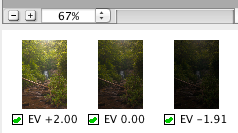
2) Select all of the bracketed images in Bridge.
In Bridge/Photoshop, you can start with RAW images (.NEF or CR2), as well as with TIFF or JPG images.
(If you select a RAW image, Photoshop will first convert it to an RGB image, based on whatever settings you lasted used when editing that RAW image.)
Use Cmd-click or Shift-click techniques to multi-select images.
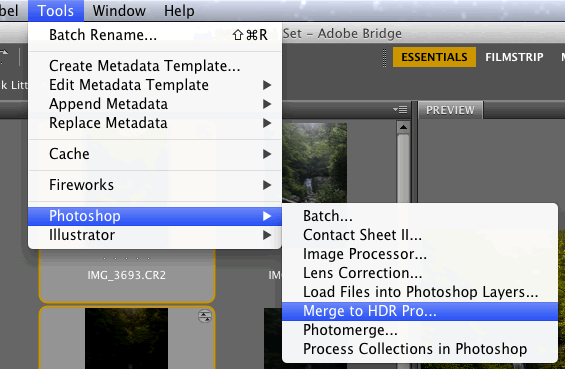
3) Give the Bridge command: Tools: Photoshop: Merge to HDR Pro...
By doing so, Bridge sends a Photoshop a command to get to work stacking and aligning your images.
Depending on image size/resolution, number of images, and depth (8-bit, 16-bit,...), you may have to wait a few moments before Photoshop shows you the initial rendition of your image stack.
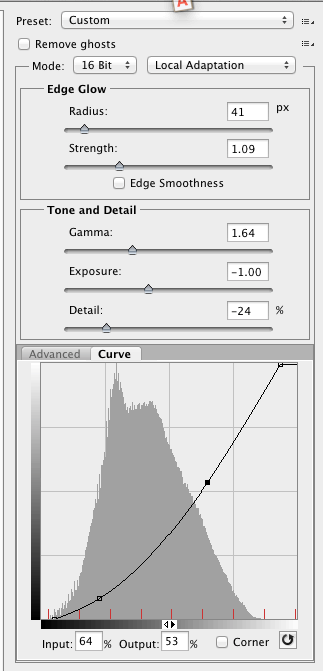
4) Wait for initial processing by Photoshop, then adjust settings to your liking.
Then, when satisfied with your image, click "OK" (lower right) to complete the blending of the stacked images into one image.The settings, below, are varied and experimented with until a satisfactory image results.
Note that the basic adjustments offered in Camera RAW are also available here.Your general working process...
— Adjust a setting.
— Observe the effects.
— Repeat until satisfied.

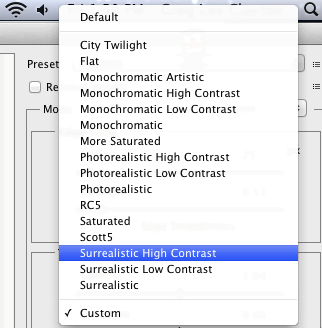
At the top right of the HDR Pro settings panel is a Preset menu that offers some "suggested" settings.
If you select any of these, then all of the sliders in the panel above will be set for you.
This is a handy way to quickly try some varied image characteristics.After selecting from this menu, you can still adjust the particular settings above, manually — thus this menu gives you a convenient way to start exploring.
The Mode menu offers some other ways of fundamentally altering how the tonal traits of your images are combined.
Try them out and see if any interest you.
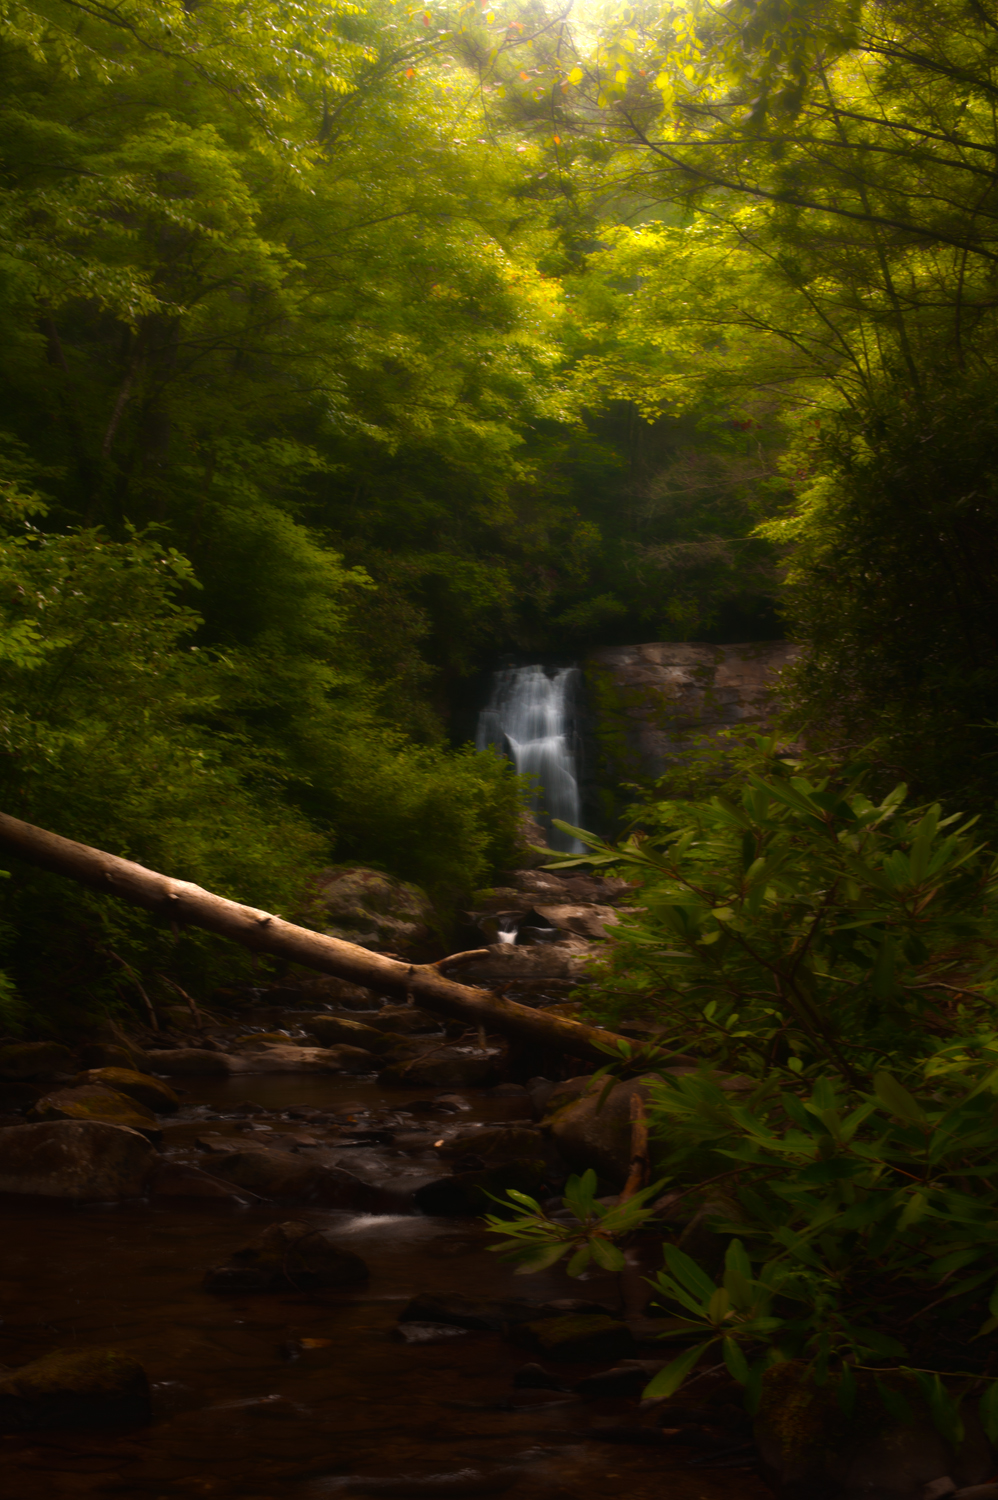
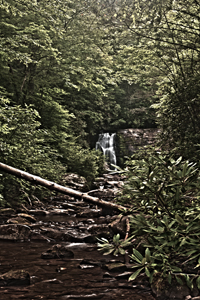
Your resulting image can vary dramatically according to the settings you apply. You may want to save several HDR images each with a different graphic character.
(note: to create more HDR's, you've got to go back Step 3, above, and reinitiate Photoshop's HDR stacking process.)

The images above and below are all created from the same three bracketed images, but the HDR settings have been adjusted differently.

Try Hand Stacking and Masking Images:
This may be the least sophisticated way to accomplish HDR images. But its a good method by which to learn what's actually going on within an HDR.
In Photoshop, put each bracketed image on its own layer.
Ideally you've got several identically framed images (i.e. you used a tripod).... if not, drag the images so that they line up correctly.
You might set the upper image(s) to 50% transparency so you can see the alignment.
You may have to rotate one or more images.The tricky part involves creating layer masks to expose the best exposed region of each image.
— in intense highlight areas, your masks will expose your darkest, or most underexposed image.
— in intense shadow areas, your masks will expose your lightest, most overexposed image.
— midtones will usually come from your "correctly exposed" images.
All of this, above, is done by manually usually using the airbrush tool to lighten and darken regions of each layer mask.Do all that, and you'll likely have a decent HDR image...and you'll appreciated the automated tools offered by Photoshop's PhotoMerge tool.
Photoshop: File: Automate: Import to HDR Pro
In Photoshop:
File: Automate: Merge to HDR Pro...
Browse to select the images to be merged. (OK when all selected)Once Photoshop loads the images and does some initial processing, one version of your HDR image will appear, along with thumbnails of your source images, and a panel of settings you can adjust on the right.
Explore the presets which are in a drop-down menu at the top of the settings panel.
Explore the impact of various settings.When you're satisfied, Click OK and Photoshop will merge all of your source photos using your settings into a single-layered image.
Hugin — for elaborate, tough, large or alt projections
Hugin is an open-source application designed primarily for creating stitched-image panoramas. Its tools can handle very large collections of images for stitching. Hugin also has tools for manipulating HDR images.
From Hugin-0.7.0 release notes: "Hugin can now create HDR output from normal exposure bracketed photos. The photos don't have to be perfectly-aligned, they don't even need to be nearly-aligned or have consistent exposure differences - The Hugin optimiser will sort all this stuff out..."
Workflow Description(old) | Video Tutorial*** |
Camera Raw — one image only
Note: this technique isn't "real" HDR, but its a quick way to get some of the advantages of HDR using a single RAW image.
Open a single RAW file in Camera Raw.
Use the Exposure Brush tool to selective under- and over-expose regions of your image.
This simple technique offers many of the advantages of stacked HDR images by allowing you to "pull" higher exposures out of some portions of your image, push lower and darker exposures into some areas, and keeping the general existing exposure for the rest. Since RAW images actually store tonal data beyond that which can be displayed in a normal dynamic range image, you do, by this method, move into a form of HDR.Note that Camera RAW 7 (CS6) has improved tools for producing a sort of HDR image from a single RAW image. See notes here on Highlights and Shadows for a discussion of those tools.
Faux HDR Toning from a single photo (video tutorial)
Again, this isn't "real" HDR, but the technique produces images that have some of the visual traits of an HDR image using only a single original image.