Creating a Screen Saver with C#
By Frank McCown
February 22, 2012
Introduction
A Windows screen saver is simply a Windows application that displays either a configuration dialog box, a preview screen, or a full-screen window, depending on the command line argument it receives. Windows screen savers have a .scr extension and are often stored in the Windows\system32 directory or Windows\SysWOW64 if you are running a 64-bit version of Windows.
This tutorial will show you how to create a screen saver with C# using Visual Studio .NET. Our screen saver will display a line of text which will randomly re-appear at different locations on the screen. The user can modify the line of text displayed which we'll save in the Windows Registry. This tutorial assumes you some familiarity with Visual Studio and C#.
If you're in a hurry and want to just download the finished project, click here, unzip the file, and load the solution file into Visual Studio (my project was built with VS 2010).
This is an update of a screen saver tutorial which I wrote years ago. A big thanks to Jacob Jordan's Making a C# screensaver tutorial which I found quite helpful in updating my own. I also found some useful tips in Lucian Wischik's article, How to write a 32bit screen saver.
Getting Started
Although we could create a screen saver in any of the .NET programming languages to develop a screen saver, we will use the C# programming language.
First start Visual Studio (I'll be using VS 2010, but Visual C# 2010 Express will also work) and create a Windows Forms Application called ScreenSaver.
Next, double-click the Program.cs file from the Solution Explorer. This file contains the Main function, the starting point for a .NET executable:
static void Main()
{
	Application.EnableVisualStyles();
	Application.SetCompatibleTextRenderingDefault(false);
	Application.Run(new Form1());
}
The Application.Run() call above instantiates Form1 and runs in a continual loop,
processing Windows messages. When the form is closed, the function returns, and
the program terminates.
We'll be making major modifications to this loop soon. But first we should rename Form1 to something more descriptive. Put your cursor on top of the word "Form1" and press F2. Enter ScreenSaverForm as the new name of the form and press OK.
Command Line Arguments
As noted in the Introduction, a screen saver receives command-line arguments which informs it which "mode" it should run in. There are three arguments it might be passed in upper or lower case:
- /p - Show the screensaver in the screensaver selection dialog box
- /c - Show the screensaver configuration dialog box
- /s - Show the screensaver full-screen
If no arguments are given, the screen saver should behave as if /c was supplied.
If /p is given, a second argument is also passed which is a decimal number representing the handle to the parent's window. For example, our screen saver might be passed /p 1234567. A window handle might also be passed for /c. Also, the window handle might be passed using a colon between the first argument and handle. Some examples: /P:1234567 and /c:7654321. Therefore we'll need to handle all these situations.
Let's re-write Main so that it takes command line parameters and processes each of these three parameters. Replace Main in its entirety with the following:
static void Main(string[] args)
{
	Application.EnableVisualStyles();
	Application.SetCompatibleTextRenderingDefault(false);

	if (args.Length > 0)
	{
		string firstArgument = args[0].ToLower().Trim();
        string secondArgument = null;

		// Handle cases where arguments are separated by colon.
		// Examples: /c:1234567 or /P:1234567
		if (firstArgument.Length > 2)
		{
			secondArgument = firstArgument.Substring(3).Trim();
			firstArgument = firstArgument.Substring(0, 2);
		}
		else if (args.Length > 1)
			secondArgument = args[1];

		if (firstArgument == "/c")           // Configuration mode
		{
			// TODO
		}
		else if (firstArgument == "/p")      // Preview mode
		{
			// TODO
		}
		else if (firstArgument == "/s")      // Full-screen mode
		{
			ShowScreenSaver();
			Application.Run();
		}
		else    // Undefined argument
		{
			MessageBox.Show("Sorry, but the command line argument \"" + firstArgument +
				"\" is not valid.", "ScreenSaver",
				MessageBoxButtons.OK, MessageBoxIcon.Exclamation);
		}
	}
	else    // No arguments - treat like /c
	{
		// TODO
	}
}
The code above looks for the three arguments, but only the /s is implemented;
we'll come back to /c and /p later. If an invalid argument is supplied,
we pop-up a modal dialog box which informs the user of the error.
In order for the code above to work, we need to write a ShowScreenSaver() function. Place this function immediately after Main().
static void ShowScreenSaver()
{
	foreach (Screen screen in Screen.AllScreens)
	{
		ScreenSaverForm screensaver = new ScreenSaverForm(screen.Bounds);
		screensaver.Show();
	}
}
This function will launch an instance of the ScreenSaverForm on each monitor
that is connected to our computer. It also requires that we implement a
constructor for the ScreenSaverForm which takes a Rectangle argument,
the display bounds for the form. We'll add this constructor in the next
section.
ScreenSaverForm
Let's now modify the main screen saver form which will be used to display a line of text at random locations on the screen.
Since we changed the name of Form1 in our code to ScreenSaverForm, we should also change the name of Form1.cs to ScreenSaverForm.cs. Do this by left-clicking on Form1.cs in the Solution Explorer, select Rename in the context menu, and type ScreenSaverForm.cs.
Now double-click ScreenSaverForm.cs to open it, and change the form's BackColor property to Black. Change the FormBorderStyle property to None so that the titlebar, buttons, and window frame are removed; this will allow us to fill the entire monitor with a black background. Finally, change the StartPosition to Manual or the screen saver will not display properly on dual monitors.
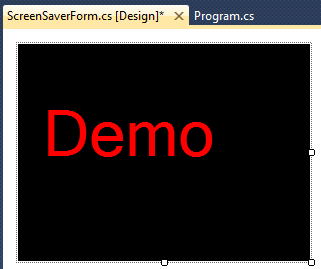
Now add a Label from the Toolbox to your form in any location. Change the Name of the label to textLabel, change the Text property to "Demo" or any other text used like to display, modify the label's Font property so it displays a larger font, and change the ForeColor to something other than black so the text is visible on the black background.
An example of my form is displayed below. The size of the form is not important since we will be resizing it programmatically later.
Now press F7 to view the code behind the form. Add the following constructor which sets the form's Bounds:
public ScreenSaverForm(Rectangle Bounds)
{
	InitializeComponent();
	this.Bounds = Bounds;
}
When the form loads, we want to hide the cursor and raise the form in front of all other visible windows. To do this, we will first add a Load event handler to the form. An event handler is a function which executes in response to a particular event.
To add an event handler, first view the form in Design mode (click the tab labeled ScreenSaverForm.cs [Design]) and locate the Properties windows which in Visual Studio is likely found in the bottom-right corner of the window. Choose the ScreenSaverForm from the drop-down list in the Properties window and click on the lightning bolt which lists all the form's events. Below is a picture of my Properties window.
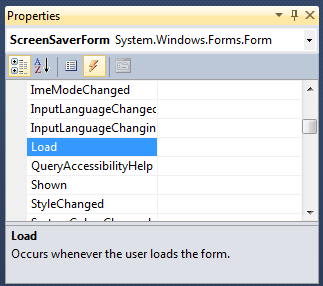
Scroll down to the Load event and double-click on the word "Load". This will create a Load event handler for you and move you back to viewing the form's code. Type the two lines of code inside this function:
private void ScreenSaverForm_Load(object sender, EventArgs e)
{
	Cursor.Hide();
	TopMost = true;
}
Do not run your application just yet! If you do, you cannot terminate the screen saver unless you use the Task Manager. That's because we only made the form visible in Program.cs, but killing the form will not kill the application. We need to first add some logic that will terminate the app when a key is pressed or when the mouse is clicked or moved.
Add event handlers for MouseMove, MouseClick, and KeyPress. Do this in the same way you added the Load event handler by scrolling through the ScreenSaverForm's list of events in the Properties window and double-clicking on each event. After the event handlers have been setup, then type in the code below.
If you merely copy and paste all the code below into your program without setting up the event handlers properly, the event handlers will not be called! Visual Studio has to write special code to attach these event handlers to the form. If you are really curious what this code looks like, take a look at the code in the ScreenSaverForm.Designer.cs file and look for lines of code that use the += operator. Don't change the contents of this file unless you really know what you are doing since this file is auto-generated by Visual Studio.
private Point mouseLocation;

private void ScreenSaverForm_MouseMove(object sender, MouseEventArgs e)
{
	if (!mouseLocation.IsEmpty)
	{
		// Terminate if mouse is moved a significant distance
		if (Math.Abs(mouseLocation.X - e.X) > 5 ||
			Math.Abs(mouseLocation.Y - e.Y) > 5)
			Application.Exit();
	}

	// Update current mouse location
	mouseLocation = e.Location;
}

private void ScreenSaverForm_MouseClick(object sender, MouseEventArgs e)
{
	Application.Exit();
}

private void ScreenSaverForm_KeyPress(object sender, KeyPressEventArgs e)
{
	Application.Exit();
}
Note that the extra logic is required in the MouseMove event handler because
the form will receive a MouseMove event when it is first displayed, so we
do a little extra work to initialize the mouseLocation point and then see
if the mouse has moved a significant distance from the last time the event
was received. (You can play with smaller or larger
values than 5 if you'd like).
If you now run your application (Ctrl-F5), you'll see that it does nothing... it immediately quits. That's because we are not sending it any command line arguments, and we have not yet implemented the configuration part of the screen saver.
Let's send the /s argument to the screen saver when we run our project so we can see how the screen saver will run in full-screen mode. Select Project -> Properties... from the main menu. Select the Debug tab and enter /s under Command line arguments:. Save the project and press Ctrl-F5. The entire screen should turn black, and the text should display at a fixed location. Pressing the mouse or moving it or pressing the keyboard will kill the application.
Now let's add the logic to move the text around the screen.
First add a Timer control to the ScreenSaverForm, and change the name of the timer to moveTimer. As shown below, add a random number generator as a class-level variable, and add some code to the end of ScreenSaverForm_Load() which will tell the timer to call the moveTimer_Tick() function every 3 seconds (3000 milliseconds) starting immediately. The moveTimer_Tick() function randomly places the textLabel at a random location in the form's bounds that ensures the entire label can be seen. You can change the 3000 to smaller or larger numbers to speed up or slow down the rate at which the text is re-positioned on the screen.
private Random rand = new Random();

private void ScreenSaverForm_Load(object sender, EventArgs e)
{
	Cursor.Hide();
	TopMost = true;

	moveTimer.Interval = 3000;
	moveTimer.Tick += new EventHandler(moveTimer_Tick);
	moveTimer.Start();
}

private void moveTimer_Tick(object sender, System.EventArgs e)
{
	// Move text to new location
	textLabel.Left = rand.Next(Math.Max(1, Bounds.Width - textLabel.Width));
	textLabel.Top = rand.Next(Math.Max(1, Bounds.Height - textLabel.Height));
}
Run the program again, and this time the text will move to different locations every 3 seconds. Press or move the mouse to terminate the application.
Preview Mode
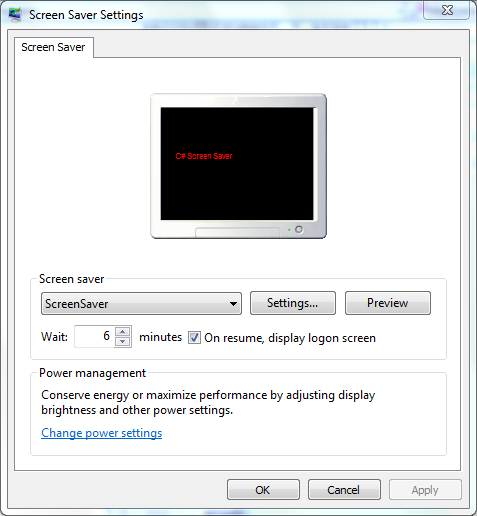
Our screen saver needs to run in "preview mode", or in a smaller rectangular rectangle in the screen saver configuration dialog box when passed the /p argument. The screenshot below shows the screen saver running in preview mode on my Windows 7 computer:
If you'd prefer not to implement a preview mode, you don't have to. Just
have your program terminate when it receives /p. We will implement a
preview mode for our program because all it entails is using
some Windows API functions and changing the font size of our text label.
In Program.cs, modify the if statement where we check for /p:
else if (firstArgument == "/p")      // Preview mode
{
	if (secondArgument == null)
	{
		MessageBox.Show("Sorry, but the expected window handle was not provided.",
			"ScreenSaver", MessageBoxButtons.OK, MessageBoxIcon.Exclamation);
		return;
	}

	IntPtr previewWndHandle = new IntPtr(long.Parse(secondArgument));
	Application.Run(new ScreenSaverForm(previewWndHandle));
}
The code above will display an error dialog if the configuration dialog box's handle
was not provided and terminate. Otherwise the application is started using
a special constructor for the ScreenSaverForm which we'll need to write next.
Go back to ScreenSaverForm.cs and the following constructor which takes the window handle as an argument:
public ScreenSaverForm(IntPtr PreviewWndHandle)
{
	InitializeComponent();

	// Set the preview window as the parent of this window
	SetParent(this.Handle, PreviewWndHandle);

	// Make this a child window so it will close when the parent dialog closes
	// GWL_STYLE = -16, WS_CHILD = 0x40000000
	SetWindowLong(this.Handle, -16, new IntPtr(GetWindowLong(this.Handle, -16) | 0x40000000));

	// Place our window inside the parent
	Rectangle ParentRect;
	GetClientRect(PreviewWndHandle, out ParentRect);
	Size = ParentRect.Size;
	Location = new Point(0, 0);

	// Make text smaller
	textLabel.Font = new System.Drawing.Font("Arial", 6);

	previewMode = true;
}
The code above uses several Windows API
functions: SetParent(),
SetWindowLong(), GetWindowLong(), and GetClientRect().
These functions are not yet accessible to your program, so the compiler
will flag each of the functions as not existing. To fix this, add the following
code just inside the ScreenSaverForm class:
[DllImport("user32.dll")]
static extern IntPtr SetParent(IntPtr hWndChild, IntPtr hWndNewParent);

[DllImport("user32.dll")]
static extern int SetWindowLong(IntPtr hWnd, int nIndex, IntPtr dwNewLong);

[DllImport("user32.dll", SetLastError = true)]
static extern int GetWindowLong(IntPtr hWnd, int nIndex);

[DllImport("user32.dll")]
static extern bool GetClientRect(IntPtr hWnd, out Rectangle lpRect);
The code above tells the compiler to look for the API functions
whose signatures are given in
user32.dll.
The DllImport() function is defined in System.Runtime.InteropServices.
Returning to the code in the ScreenSaverForm constructor, the previewMode variable will also be flagged by the compiler since it is not yet defined. Declare this class-level variable with your other variables and initialize it to false:
private bool previewMode = false;We'll use the previewMode variable in our ScreenSaverForm_MouseMove(), ScreenSaverForm_KeyPress(), and ScreenSaverForm_MouseClick() functions so we disable the ability to terminate the program by moving or clicking the mouse or pressing a keyboard key.
Modify each of the three functions by encapsulating the function code in an if statement that checks the value of previewMode like so:
private void ScreenSaverForm_KeyPress(object sender, KeyPressEventArgs e)
{
	if (!previewMode)
		Application.Exit();
}
Install Your Screen Saver
In order to test the preview code you just typed-in, your screen saver will need to be installed properly so the screen saver setting dialog box can launch it. Follow these steps:
- Change the extension of your executable file from .exe to .scr.
So your screen saver should now be named ScreenSaver.scr.
- Right-click on ScreenSaver.scr and select Install from the pop-up menu. This will launch the screen saver setting dialog with ScreenSaver selected.
You should now see your screen saver running in miniature in the settings dialog box. You can click OK if you'd like this to be your new screen saver, or you can select Cancel.
If you have administative priviledges on your computer, another way to install your screen saver is to place the ScreenSaver.scr file into C:\windows\system32 or C:\windows\SysWOW64 if you are running a 64-bit version of Windows. When the screen saver setting dialog first launches, it will scan this directory for .scr files and list them in the drop-down dialog box.
Configuration Mode
You do not have to provide the ability to configure your screen saver; when you receive a /c or no argument at all, just display a dialog box (using MessageBox.Show() is fine) that gives the user an appropriate message indicating the screen saver cannot be configured.
Let's give users the ability to modify the text being displayed by the screen saver. We'll create a new form with a text box that allows the user to set the label's text. Additionally it would be useful if the user could change the font properties and color, but I'll leave that to you to implement.
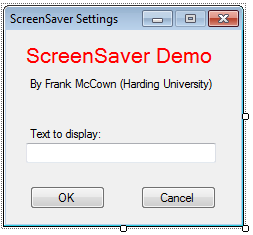
First add a new Windows Form to your project called SettingsForm. Add a TextBox control (named textBox) and OK (okButton) and Cancel (cancelButton) buttons to the form. You might also want to add some Labels that indicate who developed the screen saver and what the text box is for. Below is a screen shot of my SettingsForm.
A good place to store screen saver settings is in the Windows Registry. Let's write a function to write out the value typed into the text box into the Registry and another function to read the value from the Registry. Open SettingsForm.cs and add the following methods to the SettingsForm class:
private void SaveSettings()
{
	// Create or get existing Registry subkey
	RegistryKey key = Registry.CurrentUser.CreateSubKey("SOFTWARE\\Demo_ScreenSaver");

	key.SetValue("text", textBox.Text);
}

private void LoadSettings()
{
	// Get the value stored in the Registry
	RegistryKey key = Registry.CurrentUser.OpenSubKey("SOFTWARE\\Demo_ScreenSaver");
	if (key == null)
		textBox.Text = "C# Screen Saver";
	else
		textBox.Text = (string)key.GetValue("text");
}
The SaveSettings() function creates a key called text
in the Registry under
HKEY_CURRENT_USER called Software/Demo_ScreenSaver.
Since we're writing to a key in HKEY_CURRENT_USER, the key
will be different for each user, so each user can customize the
screen saver text. The LoadSettings() function reads the text
key, but if the key doesn't exist (it won't until we've
configured our screen saver for the first time), it uses some default text.
(RegistryKey is defined in the Microsoft.Win32 namespace.)
You can see the Registry entry by using regedit. Be careful when using this utility... changes to the Registry can make applications that depend on the values behave unexpectedly.
Since the SettingsForm should initially display whatever text is in the Registry, let's call LoadSettings() in the form's constructor:
public SettingsForm()
{
	InitializeComponent();
	LoadSettings();
}
Now add Click event handlers to the OK and Cancel buttons. We'll call SaveSettings() when the OK button is clicked but just close the form if Cancel is clicked:
private void okButton_Click(object sender, EventArgs e)
{
	SaveSettings();
	Close();
}

private void cancelButton_Click(object sender, EventArgs e)
{
	Close();
}
Now we need to launch SettingsForm when receiving the /c command-line argument or no arguments at all. Go back to Program.cs and modify the logic for handling /c and no arguments:
	if (firstArgument == "/c")           // Configuration mode
	{
		Application.Run(new SettingsForm());
	}

... skip ...

else    // No arguments - treat like /c
{
	Application.Run(new SettingsForm());
}
Finally, we'll need to load the Registry value when the ScreenSaverForm loads, so add the following code to ScreenSaverForm_Load():
private void ScreenSaverForm_Load(object sender, EventArgs e)
{
	// Use the string from the Registry if it exists
	RegistryKey key = Registry.CurrentUser.OpenSubKey("SOFTWARE\\Demo_ScreenSaver");

	if (key == null)
		textLabel.Text = "C# Screen Saver";
	else
		textLabel.Text = (string)key.GetValue("text");

	...skip...
}
You can now test the settings dialog by removing the command-line parameter from the Project settings and hitting Ctrl-F5. Or you can change the executable's extension to .scr, right-click the file and select Configure from the pop-up menu. You should also try installing the screen saver (right-click the .scr file and select Install) and clicking the Settings... button from the screen saver settings dialog box.
Conclusion
If you've meticulously followed all the instructions in this tutorial, you now have a fully functional screen saver. If you've missed a step somewhere and can't get it to run, you may want to download the complete project, unzip it, and load it into Visual Studio. I created my project with VS 2010, so if you have an older version of VS, you may need to manually re-build the project.
If you have any questions or think something in this tutorial needs clarification, feel free to contact me.
 This work is licensed under a
Creative Commons License.
This work is licensed under a
Creative Commons License.
| Harding Computer Science Dept | Page last modified: |