- Dialog boxes are secondary windows used to display specific information to users, gather information, or both
- There are two types of dialog boxes:
- modal - requires the user to dismiss the dialog box before interacting with the application
- modeless (or nonmodal) - user can interact with the application while the dialog box is open
- Common dialog boxes (later in notes) are modal
MessageBox
- The MessageBox class is used to create simple modal dialog boxes with an icon, message, and standard buttons
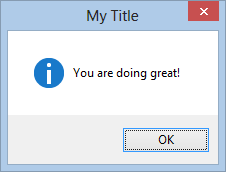
- Example with Information icon and OK button
MessageBox.Show(this, "You are doing great!", "My Title",
        MessageBoxButtons.OK, MessageBoxIcon.Information);
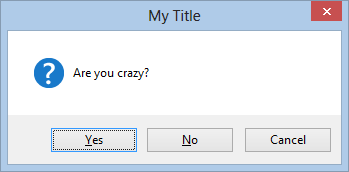
Show()returns a DialogResult enum, which indicates what button was pressedDialogResult result = MessageBox.Show(this, "Are you crazy?", "My Title", MessageBoxButtons.YesNoCancel, MessageBoxIcon.Question); if (result == DialogResult.Yes) // Yes clicked else if (result == DialogResult.No) // No clicked
- More complex modal dialogs must be created as a Form
- Create the project
- Create a new Windows Forms project
- Add a new class to your project called
Options, which will hold the app's options - Add public properties that represent the app's options:
public class Options
{
    public enum LineType { Solid, Dashed, Dotted };

    public LineType SelectedLineType { get; set; }
    public bool IsLineVisible { get; set; }
}
- Create a custom dialog box
- Add a new Widows Form to your project called
OptionsForm -
Add buttons that read OK and Cancel
- Set the OK button's
DialogResultproperty toOK - Set the Cancel's
DialogResulttoCancel - These properties will cause the dialog box to close when pressed, and they will be used by the parent window to determine which button was pressed
- Set the OK button's
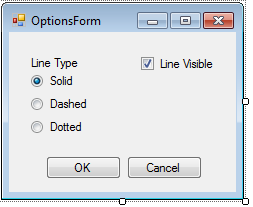
- Add radio buttons and checkboxes so the dialog box looks like this:
- Add a private
Optionsfield toOptionsForm, and make the constructor require anOptionsobjectpublic partial class OptionsForm : Form { private Options options; public OptionsForm(Options options) { InitializeComponent(); this.options = options; // Make dialog box reflect options visibleCheckBox.Checked = options.IsLineVisible; switch (options.SelectedLineType) { case Options.LineType.Solid: solidRadioButton.Checked = true; break; case Options.LineType.Dashed: dashedRadioButton.Checked = true; break; case Options.LineType.Dotted: dottedRadioButton.Checked = true; break; } } ... } -
Create a
Clickevent handler for the OK button that sets theOptionobject's properties to the selected optionsprivate void OkButton_Click(object sender, EventArgs e) { // Make options reflect what was selected in dialog box options.IsLineVisible = visibleCheckBox.Checked; if (solidRadioButton.Checked) { options.SelectedLineType = Options.LineType.Solid; } else if (dashedRadioButton.Checked) { options.SelectedLineType = Options.LineType.Dashed; } else { options.SelectedLineType = Options.LineType.Dotted; } }
- Add a new Widows Form to your project called
-
Launch the dialog box
- Add an
Optionsfield to the main form's class and instantiate it in the form's constructorpublic partial class Form1 : Form { private Options options; public Form1() { InitializeComponent(); options = new Options { IsLineVisible = true, SelectedLineType = Options.LineType.Solid }; } ... } - In your main form, drop a button and a label which will be used for launching the dialog box and determing what was selected
- When the button is pressed, launch the dialog box with
ShowDialog()private void button1_Click(object sender, EventArgs e) { var optionsForm = new OptionsForm(options); DialogResult result = optionsForm.ShowDialog(); // TODO: Check result } ShowDialog()returns back aDialogResult, which will beOKorCancel, depending on which button was pressed (closing the dialog box will also returnCancel)if (result == System.Windows.Forms.DialogResult.OK) { if (options.SelectedLineType == Options.LineType.Solid) { label1.Text = "Solid"; } else if (options.SelectedLineType == Options.LineType.Dashed) { label1.Text = "Dashed"; } else { label1.Text = "Dotted"; } label1.Visible = options.IsLineVisible; }
- Add an
- Run the application, press the button to launch the dialog, change the dialog box settings, press OK, and notice the parent window reflecting the settings
- Launch dialog, change settings, press Cancel, re-launch dialog and verify settings are reset to previous values
- Unless the dialog box should be resizable (which is rare), remove the ability to
resize the dialog box and remove the maximize button
FormBorderStyle=FixedDialogMaximizeBox=False
- The best starting location for the dialog is centered in the parent form:
StartPosition=CenterParent - Always have OK and Cancel buttons available, and make the Cancel button reset the dialog box back to its original configuration
- Closing the dialog box via the close button (X) on the title bar should have the same effect as pressing Cancel
- In Windows, OK is always on the left, Cancel on the right
- Don't use scrollable dialog boxes, menu bars, or status bars
- Modal & Nonmodal Dialogs: When (& When Not) to Use Them
- Confirmation Dialogs Can Prevent User Errors — If Not Overused
- Windows User Experience Interation Guidelines for Dialog Boxes